I had a 24 at home that I used for the bottom support. Attach the End Pieces to the 47-Inch Sawhorse.
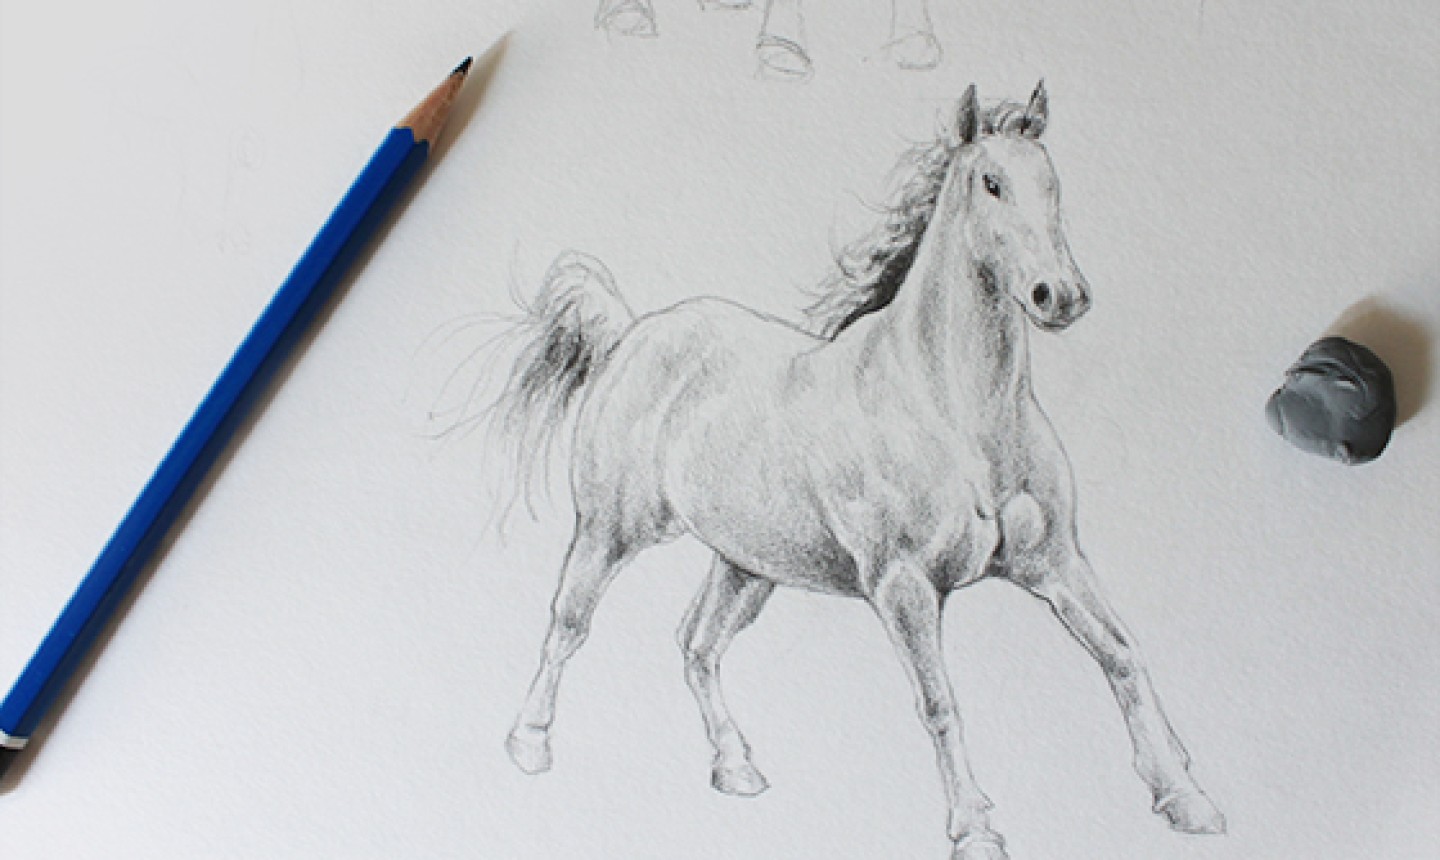
How To Draw A Horse With Pencil
This will help to get the legs and body in the right place.

. Its super easy art tutorial for beginners only follow me step by step if you need more time. Made from durable red oak MDF. Draw a circle shoulderchest guide little tip.
Start your drawing by very lightly sketching a rough outline of the horse to indicate its placement on the paper. This does not have to be perfect or even really look like a horse it should just be a general idea so you have an approximate start and endpoint and to make certain it will all fit onto the paper. Woodworkers who want to build themselves a shaving horse is scarce.
The one below should be smaller than the circle on top. Cut the back or top board of your horse which will be sawed square on both ends about 42-48 inches 107-122cm long. I used Charcoal soft pencil in this paintingCharcoal pencil I used.
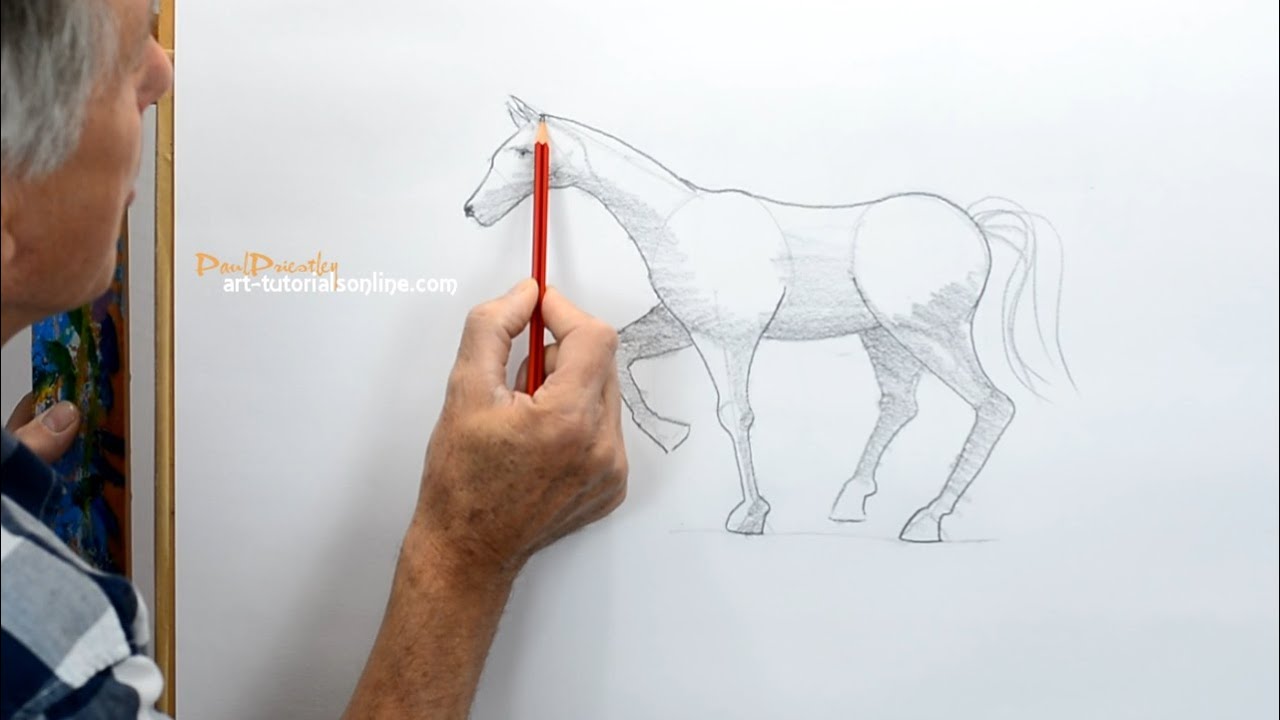
You will find yourself confidently drawing a horse without struggling on one challenging body part. When first learning how to draw a horse I found this practice to be very useful. Easy Step By Step Horse Drawing Tutorial.
The safest way is to use the. Make the rectangle a little wider for a short-legged pony taller for a leggy thoroughbred or square in the middle. Do this focused drawing with each body partlegs eyes head and so on.
Not all drawings have the measurements displayed but you can use the measurement tool in SketchUp to easily and accurately determine the dimensions of each lumber part. Draw a straight line from your horses forehead to his muzzle. Connect these circles using a rectangle.
Create the end pieces for the 47-inch sawhorse the same way you did for the 49-inch sawhorse. The ears and eyes. Draw a line to the mouth and end it with a sphere.
We do not provide support for this software. Let the reference. Draw the beginning of the front legs and the rear legs.
This new layer should appear on top of your sketch. Think of the circle as the face of a clock. Seat is 17 high.
Refine your horse sketch using layers. Draw circles for the eyes and nostril. Make sure you leave room on the left of your paper for the horses head and neck.
Sketch the upper neck and lower back towards the tail. Sketch it lightly without pressing too hard. Draw 2 tear drop shapes for the ears.
The shaving horse described in the following plans and instructions incorporates the functions of a traditional chairmakers low bench. These plans and instructions may be used by anyone with intermediate woodworking skills to build a traditional English shaving horse. A base brace adds stability.
First draw a rectangle as big as you want the back of the horse to be. On the layer featuring your horse body sketch use the Layer Properties menu to turn the. Adjust your layer opacity.
Connect both forms with another line to create the lower part of the head. Make two pencil marks on the 2x4 piece where the edges of the side pieces reach. Draw the lower neck.
A Realistic Horse Head Download Article 1 Draw two circles that follows a slanted direction. Learn how to draw a Horse step by step. Make a new layer by hitting the button.
Finish the underbelly and the 2 legs and hooves. A Westerberg Fine Art. How to Draw a Horses Head Step 1 Time for the details.
Pretty cartoon horse or pony drawing for beginnersEasy simple follow along draw. Do the same process for the other end of the sawhorse. Sturdy art furniture with upright and grooved seat for securing drawing boards up to 30 high.
This side line should be placed roughly in two-thirds of the heads height. Most drawings do not have instructions its assumed you can build it based on the completed drawing provided. Sketch the horses neck.
Draw a second slightly smaller circle to the right backbehind guide. Follow along to learn How to Draw a Horse easy step by step art tutorial. Make a mark an inch or so from each end and draw a square line to determine where to attach the legs on both sides.
Begin with the Horse Body Guidelines Step 1-9 Lightly sketch these lines lightly with a pencil. Back board rest is 12 x 33 high. Create the sides of the head with two lines.
The space between both forms should be roughly smaller than the sphere. Horse Drawing Lets Draw the Head. Add a few more lines to the front and rear legs dont forget to add the ear.
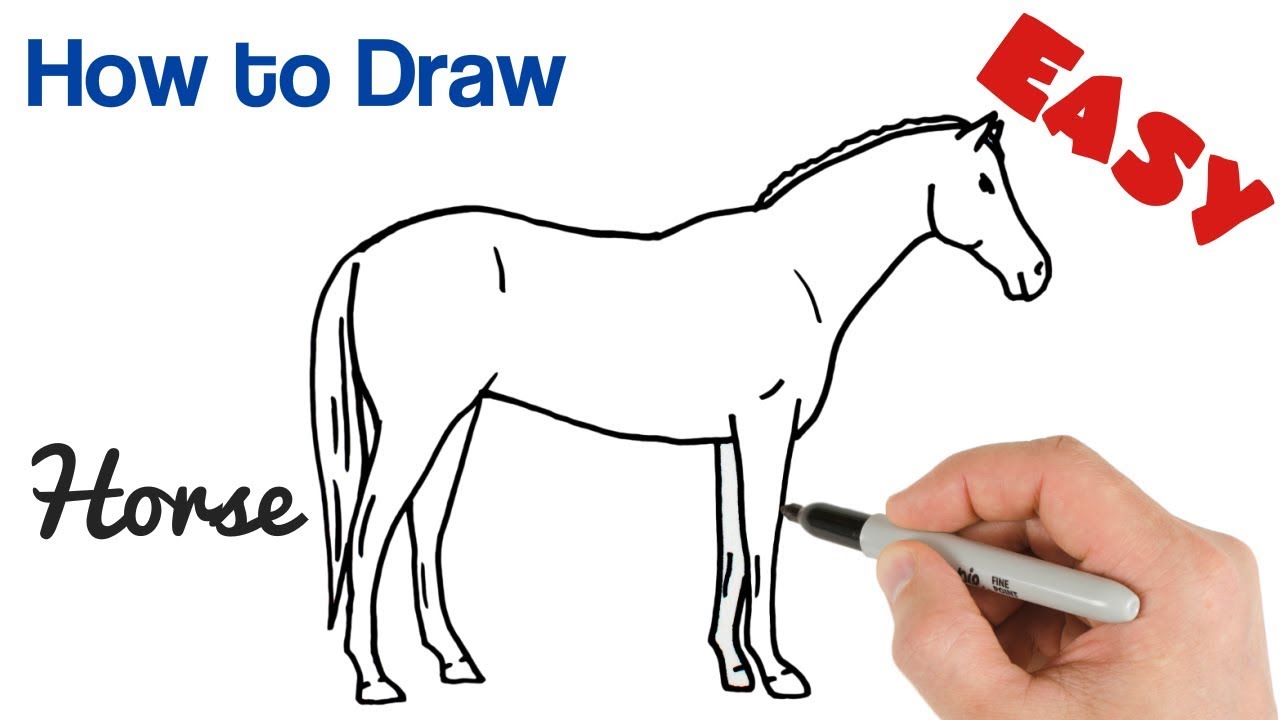
Learn how to draw a horse easy with these steps. Take a piece of 2x4 and hold it over the ends of two side pieces. Once you are producing good looking parts put them all together and draw the whole horse.
Draw a line from your horses jaw to her chin. How to Draw a Horses Body Step 1 Draw an oval for the chest. You can use any type of wood you like.
Four Pieces of wood 34 x 9or 34 x 12. Do you want to learn how to draw a horse easy for beginners. Begin by drawing the forehead of the Horse.
How to Draw a Horses Legs Step 1 First we need to find the distance to the ground. 3 Add the ears on the upper portion of the head. I went to Home Depot and had them cut one 8 foot 34 x 9 inch piece of white birch into 2 32 pieces and 1 16 piece.
2 Draw a curved line that also connects the two circles on one side. Create a new layer.
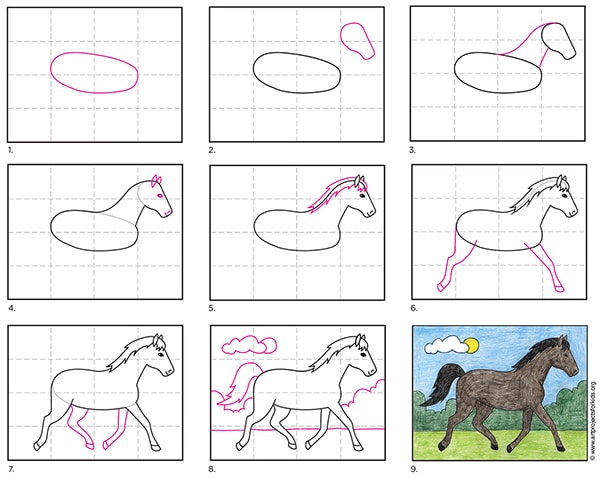
Easy How To Draw A Horse Tutorial And Horse Coloring Page
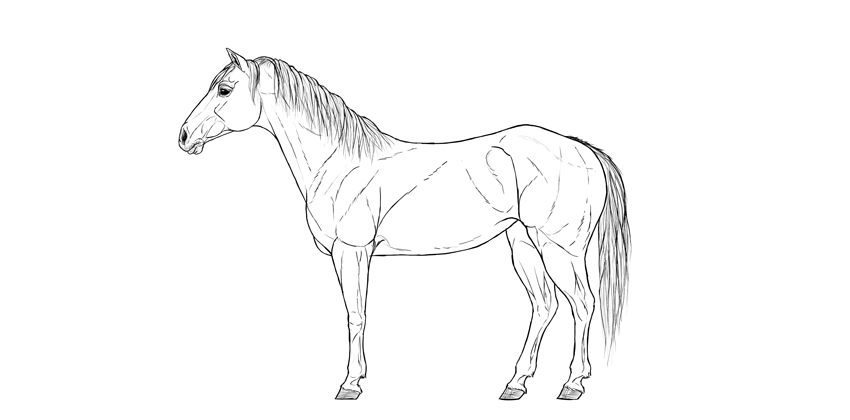
How To Draw A Horse Step By Step
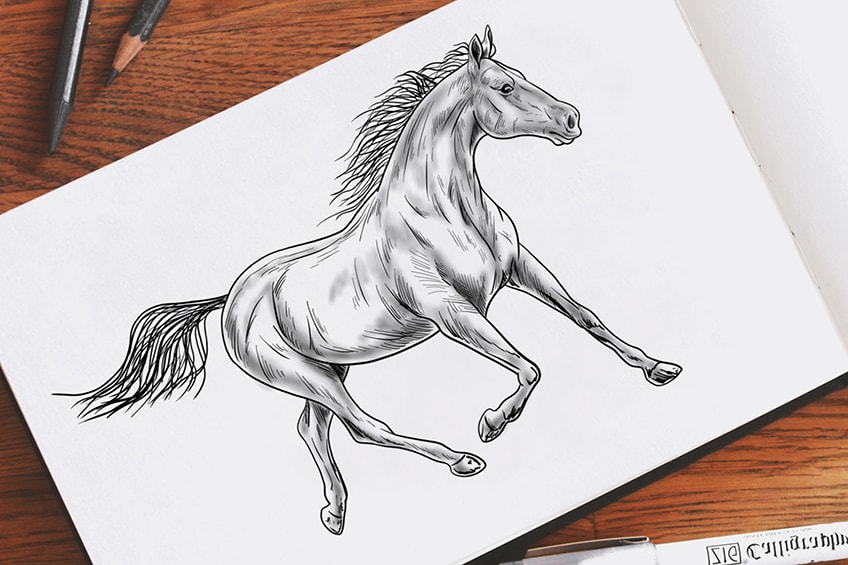
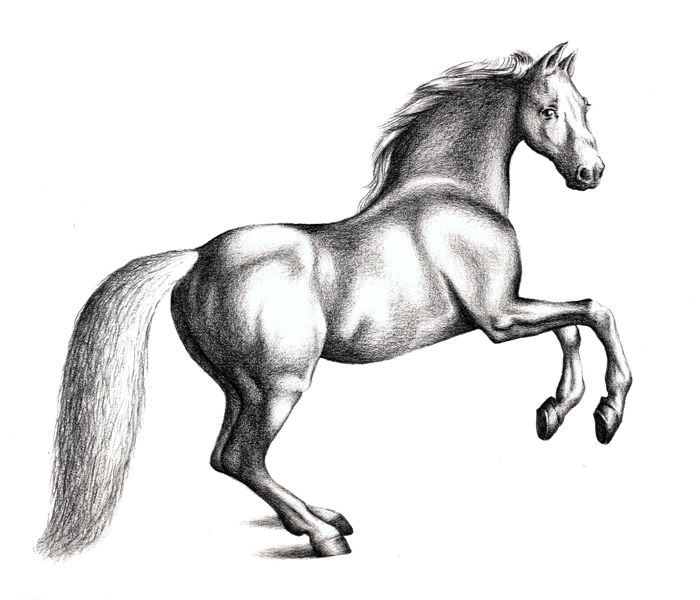
How To Draw A Horse A Detailed And Easy Horse Drawing Tutorial
How To Draw Horses And Goats Free Tutorials On Craftsy Craftsy
How To Draw A Horse Step By Step Youtube
How To Draw A Horse Simply Youtube
How To Draw A Horse Easy Step By Step Drawing Youtube
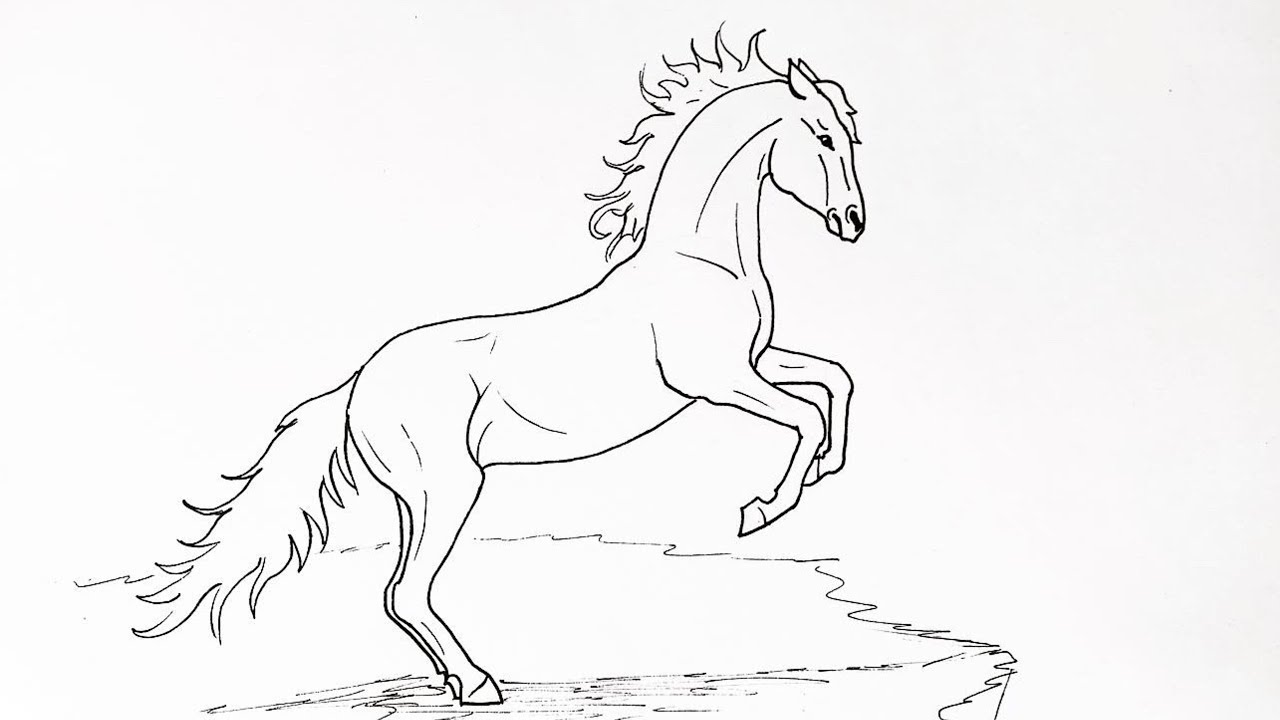
How To Draw A Horse Rearing Up Step By Step Youtube
0 komentar
Posting Komentar